Overview
This article explains how to upgrade your Timeline Add-in subscription to Plus. The upgrade is completed in the Account Center and takes effect after you download and install the latest version of Timeline.
Only Billing Owners and Workspace Admins can upgrade a subscription. If your subscription was purchased for you by someone else, contact your Billing Owner to request the upgrade.
Use this guide to find the section that applies to your situation.
A) Completing the Upgrade in the Account Center
B) Activating the Upgrade in PowerPoint
A) Completing the Upgrade in the Account Center
Step 1: Go to the Manage Tab
Visit lucensoftware.com and log in with your Billing Owner or Workspace Admin credentials.
In the left navigation, go to Admin > Subscriptions and select the subscription you want to upgrade. Click the Manage tab.

Step 2: Open the Upgrade Panel
Click Upgrade to open the Update subscription panel.
Step 3: Select Timeline Plus
In the Update subscription panel, locate the Timeline Plus row and click Upgrade.

You can add licenses to the subscription in addition to placing an upgrade order.
Step 4: Review and Complete Your Purchase
Click Review changes and follow the prompts to finalize the purchase.
B) Activating the Upgrade in PowerPoint
Step 1: Download and Install the Latest Version
Download and install the latest version of Timeline from lucensoftware.com/updates. Having the latest version ensures access to all Plus features.
Step 2: Open PowerPoint
After installing, open PowerPoint. If your upgrade is active, you will see Timeline Plus in the ribbon.

This means the upgrade has been activated automatically and you can start creating Plus timelines and roadmaps.
Step 3: Refresh Your License if Needed
If the Timeline tab still shows your previous plan after opening PowerPoint, go to Account > Refresh License.
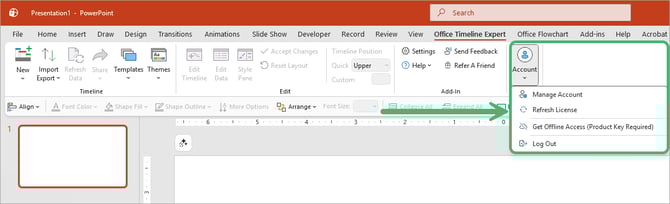
Click Refresh in the window that pops up. Your updated plan will appear in the Timeline tab.