Note: Smartsheet is updating its API, and older versions of the Office Timeline Add-in will no longer support the integration after February 6, 2026. To continue using Smartsheet with Office Timeline, please update to the latest version of the Add-in before this date.
Updating to the latest version gives you access to our new email sign-in and improved license management, replacing product key activation.
Overview
When you import Smartsheet data into Office Timeline, the resulting PowerPoint timeline remains linked to the original sheet you loaded the data from. This allows you to update your visual effortlessly when your Smartsheet plan changes, by using Office Timeline’s Refresh Data wizard. Below we’ll show you how it works.
You'll read about:
A) Getting started
B) Filtering what you see in the Refresh data list
C) Selecting the items to refresh and what happens depending on status
Read the whole guide or click the links above to jump straight to the chapter you’re interested in.
A) Getting started
To start updating a timeline imported from Smartsheet, click the Refresh Data button on the Office Timeline ribbon in PowerPoint, and then log in to your Smartsheet account in the window that pops up.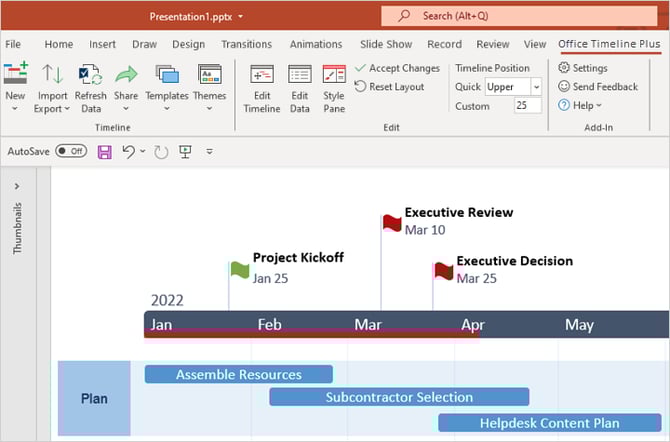
You will be directed to the Refresh Data wizard, where all the magic happens.
 Quick tip: If you want to use another Smartsheet file than the one already linked to your timeline, click on “Change file” next to your sheet’s name in the upper-left corner of the Refresh Data window.
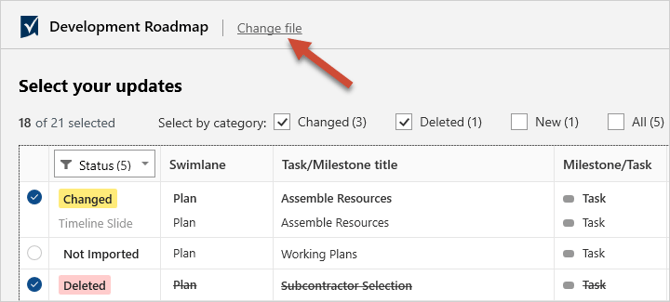
B) Use filters to view what's relevant to you
In the Refresh Data window, you will see all the data that differs in Smartsheet compared to your current timeline, as well as a Status for each item, so you can get an accurate view of the updates.
 If you want to refine what you see in the data table, there are 2 ways you can filter your view:
-
Use the Status filters in the top-left corner of the table to show or hide from view all items with a specific status. To do so, click the dropdown arrow next to “Status” and check or uncheck whatever you wish from the menu.

-
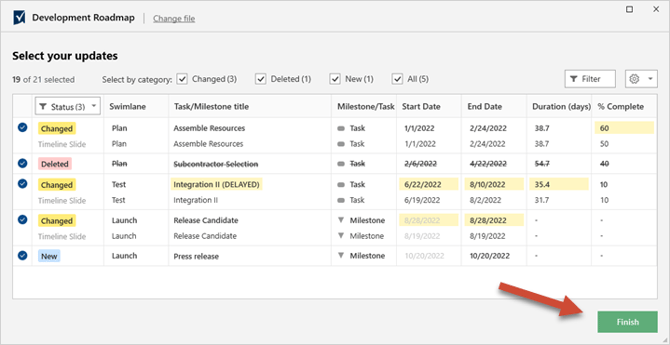
Apply custom filters to refine your view even further. Simply click on the Filter button located on the top-right of the data table, and then add your conditions in the window that pops up.

Note that both types of filters (Status and Custom) will affect only your current view – they have no impact on the actual timeline. Only the rows you select (or deselect) from the data table will impact your visual.
C) Selecting items to refresh and what happens based on status
After you’ve set up your filters to see exactly what you need in the refresh list, you can easily select the updates you want to apply to your timeline by checking the boxes in the leftmost column:
 To move even faster, use the checkboxes above the data table to select or deselect entire groups of items based on their status.
 Speaking of statuses, let’s see what each of them means and how they work when refreshing data:
Overview of statuses
Changed 
One or more of an item’s values (title, start date, end date etc.) differ in Smartsheet compared to your current timeline. We show you both the timeline version and the Smartsheet version of said item (task/milestone), with the differences highlighted, so you can easily decide which version to keep.
- Select a Changed item to bring its Smartsheet version into your timeline when refreshing data.
- Deselect it to keep the values you currently have on your visual.
Deleted![]()
The task/milestone exists on your current timeline but was deleted from Smartsheet.
- Select a Deleted item to remove it from your timeline.
- Deselect it to ignore the deletion and keep the task/milestone on your timeline.
New![]()
The item didn’t exist in Smartsheet the last time you imported or refreshed your sheet.
- Select a New task or milestone to add it to your timeline.
- Deselect it to ignore it when refreshing data.
Imported![]()
The item is already on your timeline and hasn’t suffered any changes since you last imported it.
- Select an Imported item to keep it on the timeline.
- Deselect it to remove it.
Not Imported![]()
The item existed in Smartsheet the last time you imported your sheet, but you didn’t bring it into the timeline.
- Select a Not Imported item to add it to the timeline.
- Deselect it to ignore it when refreshing data.
Invalid![]()
The item is not importable (e.g. the title or start & end dates may be missing). To fix invalid items, go back to Smartsheet, double-check the task names and dates, and correct any errors or empty cells in your sheet.
Once done choosing the items to refresh, click the green Finish button, and that’s it - your timeline will instantly be updated.
Notes:
- You can use the Data refresh settings menu in the upper-right corner to choose if you want to import 1-day tasks as milestones or to ignore title changes when refreshing data.

- Refreshing data goes one way only. It will update your PowerPoint timeline to match the changes in your Smartsheet file. Office Timeline will not impact or change your original sheet in any way.